How is Socapex Wired?
Welcome to our comprehensive guide on understanding how Socapex connectors are wired. Known for their reliability in stage lighting and live events, Socapex connectors are a cornerstone in entertainment production. This guide will explore their structure, history, and evolving uses, ensuring you grasp the essentials of their wiring and configuration.

The Socapex connector is a robust electrical connector featuring a multi-pin configuration that ensures safety and proper function. Typically available with 19, 37, or 85 pins, the 19-pin model is the most common, offering six live, six neutral, and six ground pins, plus a central alignment pin for flawless connectivity1. This design ensures that power distribution is both efficient and safe, making it ideal for high-current applications in live entertainment1.
Understanding the wiring and configuration of Socapex connectors is crucial to avoid misconnections. Proper maintenance, including regular inspection and storage, can prevent failures during critical events and extend the life of your cables1. In this guide, we’ll delve into key terms and concepts, providing a detailed overview to help you master Socapex wiring.
Key Takeaways
- Socapex connectors are widely used in live events and stage lighting due to their reliability.
- The 19-pin configuration includes six live, six neutral, and six ground pins, plus a central alignment pin.
- Regular maintenance is essential to prevent failures and extend cable lifespan.
- Understanding wiring configurations is crucial for safe and efficient power distribution.
Understanding Socapex Connector Basics
The Socapex connector has become a cornerstone in the entertainment industry, known for its durability and versatility. Let’s explore its history, core components, and how it has evolved into the reliable connector we know today.
History and Evolution of Socapex
Created in 1961, the Socapex connector was designed to meet the growing demands of stage and film productions. Over the years, it has evolved to become a standard in live events, offering a secure and efficient way to handle power distribution. Its durability and adaptability have made it a favorite among technicians and engineers2.
Core Components and Pin Configuration
The Socapex connector features a robust design with hot, neutral, and ground pins, plus a central alignment pin for secure connections. The 19-pin model is the most common, supporting six live, six neutral, and six ground pins. This configuration ensures efficient power distribution, making it ideal for high-current applications3.
The term “Socapex connector” is widely used, even for off-brand versions, due to its popularity. The breakout capabilities of these connectors allow for multiple power circuits in a single cable, enhancing convenience and reducing clutter4.
The female Socapex connector plays a crucial role in facilitating secure connections, while specialized pin connectors ensure proper alignment. This design prevents misconnections and ensures safety, especially in high-voltage environments2.
Socapex Connector Wiring Explained
Understanding how Socapex connectors are wired is essential for ensuring safe and efficient power distribution in live events and stage lighting. The wiring process involves detailed diagrams that guide the configuration of these connectors, making them highly reliable for professional use.
Detailed Wiring Diagram Insight
A typical Socapex wiring diagram outlines the precise configuration of the connector’s pins. For instance, the 19-pin model features six live, six neutral, and six ground pins, with one central alignment pin for secure connections5. This setup allows the connector to handle six individual circuits at mains voltage, ensuring efficient power distribution.
Break-in and Break-out Assembly Concepts
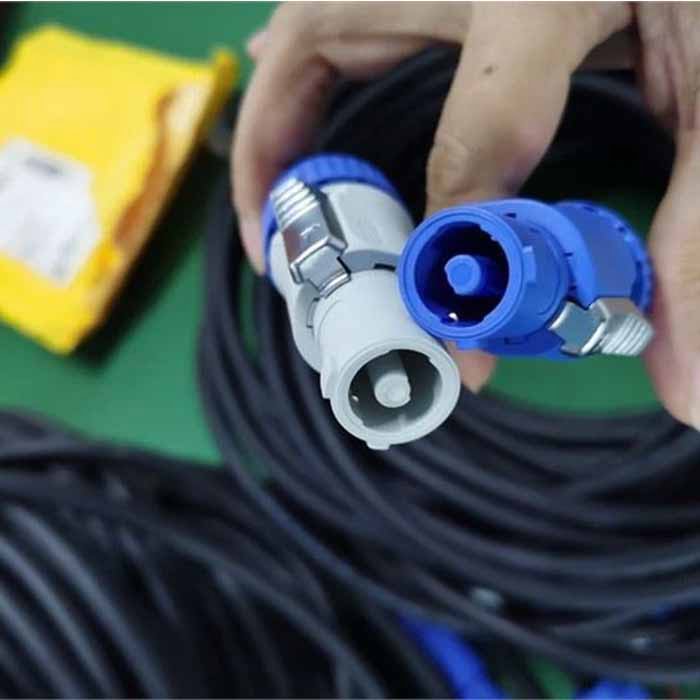
The break-in assembly, typically a male connector, is designed to terminate the end of a multi-cable, while the break-out assembly uses female connectors to distribute power to individual fixtures. This design prevents misconnections and ensures safety, especially in high-voltage environments6.
The use of breakout assemblies is crucial for connecting multiple fixtures, as they allow for the distribution of power through a single cable. Proper termination of the cable ends is vital to maintain the integrity of the connection and ensure reliable performance during events.
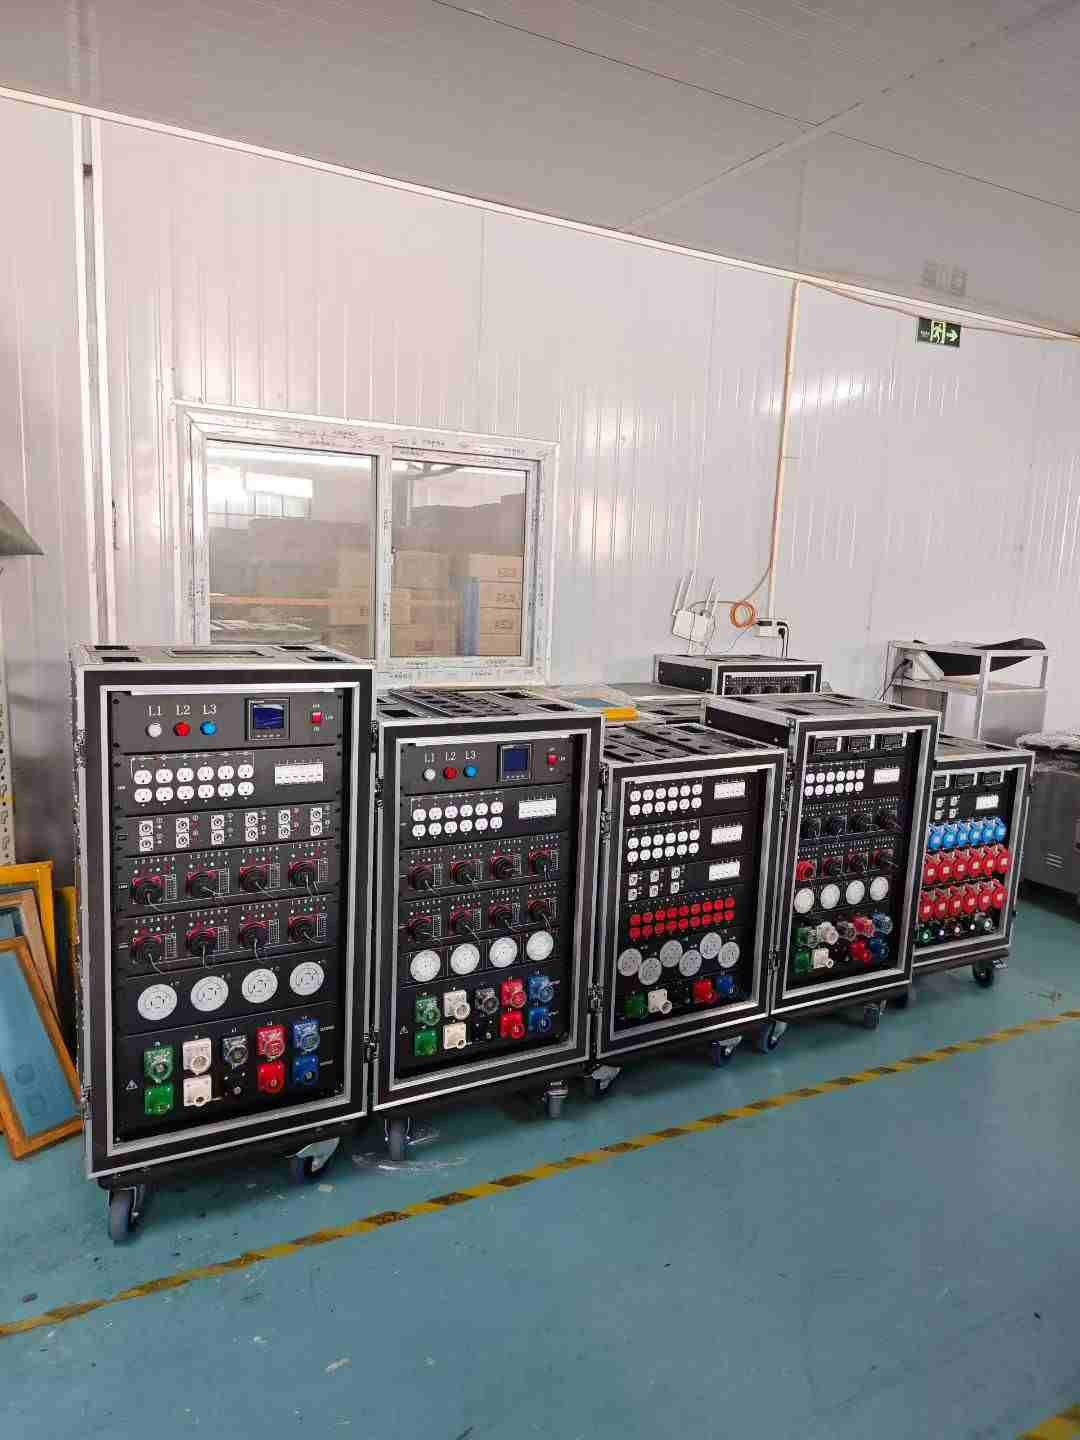
Different Socapex Assemblies for Stage and Entertainment
When it comes to Socapex connectors, understanding the different assemblies available is crucial for stage and entertainment applications. Two primary types stand out: panel-mounted and portable assemblies. Each offers unique benefits, catering to specific needs in live events and stage lighting.
Panel-Mounted vs. Portable Assemblies
Panel-mounted assemblies are integrated directly into fixtures, minimizing extra equipment and streamlining setups. This design is ideal for permanent installations or fixtures that require a clean, clutter-free appearance. For instance, fixtures like PARbars often use panel-mounted connectors to create daisy-chained displays, enhancing efficiency and reducing the need for additional cables7.
Portable assemblies, on the other hand, are designed for flexibility and convenience. They often feature female Socapex connectors, allowing devices to be chained together effortlessly. This setup is perfect for temporary events or setups where equipment needs to be moved frequently. The use of breakout and break-in concepts in portable assemblies ensures safe and efficient power distribution, even in high-voltage environments8.
| Feature | Panel-Mounted | Portable |
|---|---|---|
| Design | Integrated into fixtures | Flexible, for temporary use |
| Usability | Minimizes equipment, clean setup | Allows device chaining |
| Connector Type | Male connectors | Female connectors |
| Application | Permanent installations | Temporary events, easy movement |
Choosing the right assembly type depends on the event’s nature and equipment requirements. Panel-mounted solutions simplify installation and maintenance, favored in venues where fixtures are permanent. Portable assemblies offer the flexibility needed for touring productions or one-off events, where quick setup and teardown are essential.
Exploring Socapex Applications in Live Events
In live events, Socapex connectors play a vital role in managing power distribution efficiently. Their integration with dimmers and circuit management systems is a key feature that enhances performance reliability.
Integration with Dimmers and Circuit Management
When it comes to managing complex circuits, Socapex connectors are indispensable. They are widely used in circuits linked to dimmer packs, ensuring smooth power distribution to multiple lighting fixtures9. This setup allows for precise control over each circuit, making it easier to manage stage lighting dynamically.
The use of breakout assemblies in Socapex connectors is particularly beneficial. These assemblies enable the distribution of power to multiple fixtures through a single cable, significantly reducing cable clutter10. This not only streamlines the setup but also enhances safety by minimizing the risk of tripping hazards and electrical mishaps.
Fixtures in stage lighting often use Socapex connectors to simplify electrical connections. This integration allows for the combined use of dimmers and power circuits, ensuring reliable performance during live events9. Proper circuit configuration is crucial to prevent overloading and ensure safe operation.
The robust wiring and integration offered by Socapex systems bolster lighting design, allowing for more flexibility and creativity. Whether it’s a touring production or a permanent installation, Socapex connectors provide a reliable solution for managing power distribution efficiently.
Benefits of Choosing Socapex for Electrical Connections
When it comes to electrical connectors, reliability and safety are paramount, especially in demanding environments like live events and stage lighting. This is where Socapex connectors truly shine, offering a combination of robust construction and advanced safety features that make them a top choice for professionals.
High Reliability and Safety Features
The reliability of Socapex connectors is evident in their durable design and UL approvals, ensuring they can withstand the rigors of touring and high-demand settings11. These electrical connectors are engineered to minimize risks, providing a secure and efficient way to distribute power. For instance, the Socapex 19-pin model supports up to six separate circuits, reducing the number of cables needed and enhancing setup efficiency12.
Industry-leading examples like Powercon models highlight the exceptional safety standards of Socapex connectors. These connectors are designed to handle high-current loads, ensuring reliable power distribution even in the most demanding applications12. The use of proper lighting connectors is crucial for safe and efficient live events, and Socapex connectors deliver with their well-designed features and robust insulation12.
Choosing a Socapex connector offers long-term benefits, including reduced setup time and lower replacement frequencies, leading to overall cost savings in large-scale productions11. Their ease of use and durability make them a preferred choice for professionals seeking uninterrupted power supply to stage fixtures12.
Safety, Standards, and Voltage Compatibility
When it comes to electrical connectors, safety and compliance with industry standards are paramount. Socapex connectors are designed with rigorous safety protocols to ensure reliable performance in demanding environments.
UL Approvals and Protective Keying
The Socapex connector meets UL approvals, ensuring it adheres to strict safety standards for electrical connectors13. One of the standout features is its protective keying system, which prevents incorrect voltage insertion. This system ensures that connectors can only interface with compatible circuits, reducing the risk of electrical mismatches and enhancing overall safety13.
Ensuring Correct Voltage and Connector Matching
Proper voltage and connector matching are critical for safe operation. The female Socapex configuration is designed to reduce user error by only accepting correctly matched components13. This design ensures that the electrical connector functions safely and efficiently, even in high-powered circuits. Additionally, the wiring requirements for Socapex connectors are carefully specified to maintain a secure and reliable connection13.
| Feature | Specification | Benefit |
|---|---|---|
| UL Approvals | Meets strict safety standards | Ensures reliable performance |
| Protective Keying | Prevents incorrect voltage insertion | Reduces risk of electrical mismatches |
| Voltage Compatibility | 600 VAC and 700 VDC max | Safeguards equipment and users |
By adhering to these safety standards and voltage compatibility guidelines, Socapex connectors provide a secure and efficient solution for power distribution in live events and stage lighting.
Commercial Solutions and Custom Socapex Options
For professionals seeking tailored solutions, Socapex connectors offer a wide range of commercial and custom options designed to meet specific needs. These solutions include breakout boxes, custom cable assemblies, and accessories like backshells, which enhance flexibility and application range in professional settings.
Overview of Breakout Boxes and Accessories
Breakout boxes are essential for accessing multiple output options from a single connector. For instance, breakout assemblies allow users to distribute power to multiple fixtures through one cable, reducing clutter and enhancing setup efficiency14. These assemblies are particularly beneficial for professional touring, where quick setup and teardown are crucial.
| Feature | Breakout Boxes | Accessories |
|---|---|---|
| Applications | Professional touring, temporary events | Panel integration, custom installations |
| Design Features | Multiple output options, durability | Backshells, panel integration |
| Benefits | Reduces cable clutter, enhances efficiency | Simplifies installation, improves safety |
Custom cable assemblies and backshells provide additional flexibility, allowing for tailored connector types and configurations. Powercon breakout boxes, for example, are engineered for durability and ease of use, making them ideal for high-demand environments15. These solutions simplify installation and maintenance, ensuring reliable performance in live events and stage applications.

Investing in high-quality, custom Socapex solutions offers long-term benefits, including reduced setup time and lower replacement frequencies, leading to overall cost savings in large-scale productions.
Conclusion
In conclusion, our comprehensive guide has explored the essential aspects of Socapex connectors, highlighting their robust design, safety features, and versatility in professional applications. As a trusted brand with a history spanning over 60 years, Socapex connectors have evolved to meet the demands of modern stage lighting and live events16.
The key benefits of Socapex connectors lie in their efficient power distribution, secure connections, and adherence to strict safety standards. Whether you’re managing complex circuits or simplifying cable setups, these connectors offer reliable solutions that enhance performance and safety. Their adaptability, combined with innovative commercial solutions, makes them a preferred choice for professionals seeking efficiency and durability17.
As you reach the end of this discussion, we encourage you to explore further and ensure proper installation guidelines are followed. Selecting the right Socapex connector is crucial for the success of any professional lighting or stage setup. With their proven track record and customizable options, Socapex connectors continue to be an indispensable tool in the entertainment industry.
FAQ
What is a Socapex connector?
A Socapex connector is a type of electrical connector commonly used in stage and entertainment lighting. It’s designed to handle multiple circuits in a single connector, making it ideal for powering lights and other equipment efficiently.
How is a Socapex connector wired?
These connectors typically use a 19-pin configuration, with each pin designated for specific functions like power, control signals, or grounds. This setup ensures reliable connections for various applications.
Are Socapex connectors compatible with other brands?
Yes, they can be compatible with other brands like Powercon, often using adapters for secure connections. This flexibility makes them versatile for different setups.
What’s the difference between male and female Socapex connectors?
Male connectors have pins, while female connectors have receptacles. Using the correct type ensures proper connections and prevents damage to your equipment.
Can Socapex connectors be used outdoors?
Absolutely! They can be used outdoors with options like backshells and waterproofing to protect against environmental factors, ensuring durability and safety.
What is a breakout assembly?
A breakout assembly splits a single connector into individual circuits, allowing connection to multiple devices. It’s perfect for lighting and power distribution systems.
How do I ensure Socapex connectors are safe?
Always check for UL approvals, match the correct voltage, and inspect connectors regularly. These steps help maintain safety and prevent potential hazards.
Are custom Socapex assemblies available?
Yes, custom assemblies can be tailored to your needs, offering options like different lengths, connectors, and backshells to suit specific applications.
What is a backshell, and why is it important?
A backshell is a protective covering that provides strain relief and environmental protection. It’s crucial for maintaining the integrity and longevity of your connectors.
Can I use Socapex connectors for non-lighting applications?
Yes, they’re versatile! Use them for power distribution, audio equipment, and more, making them a reliable choice beyond lighting.
Source Links
- 소카펙스는 어떻게 연결되나요? % %
- The Complete Guide To Stage Lighting Power Connectors & Plugs
- Socapex Wiring Diagram and Where to use- Essential Supplies UK
- The Lighting System – Patching & Connecting – Theatrecrafts.com
- Socapex 19 Pin Circuit Drawings & Wiring Diagram | Phase 3 Connectors
- Electronics 2000 | Pin-outs | Socapex Connectors
- Socapex
- SL 61 – SL 61 & SOCA
- What are Socapex Connectors? | Phase 3 Connectors
- What is a Socapex Cable Used For? % %
- Why Choose Socapex 19 Pin Cable for Professional Lighting Setups? % %
- How is Socapex Wired? % %
- Showsafe Socapex Connectors – Phase 3 Connectors USA
- Socapex Wiring Diagram and Where to use- Essential Supplies UK
- Rugged USB-C connector for harsh environments
- Amphenol SOCAPEX by CMR